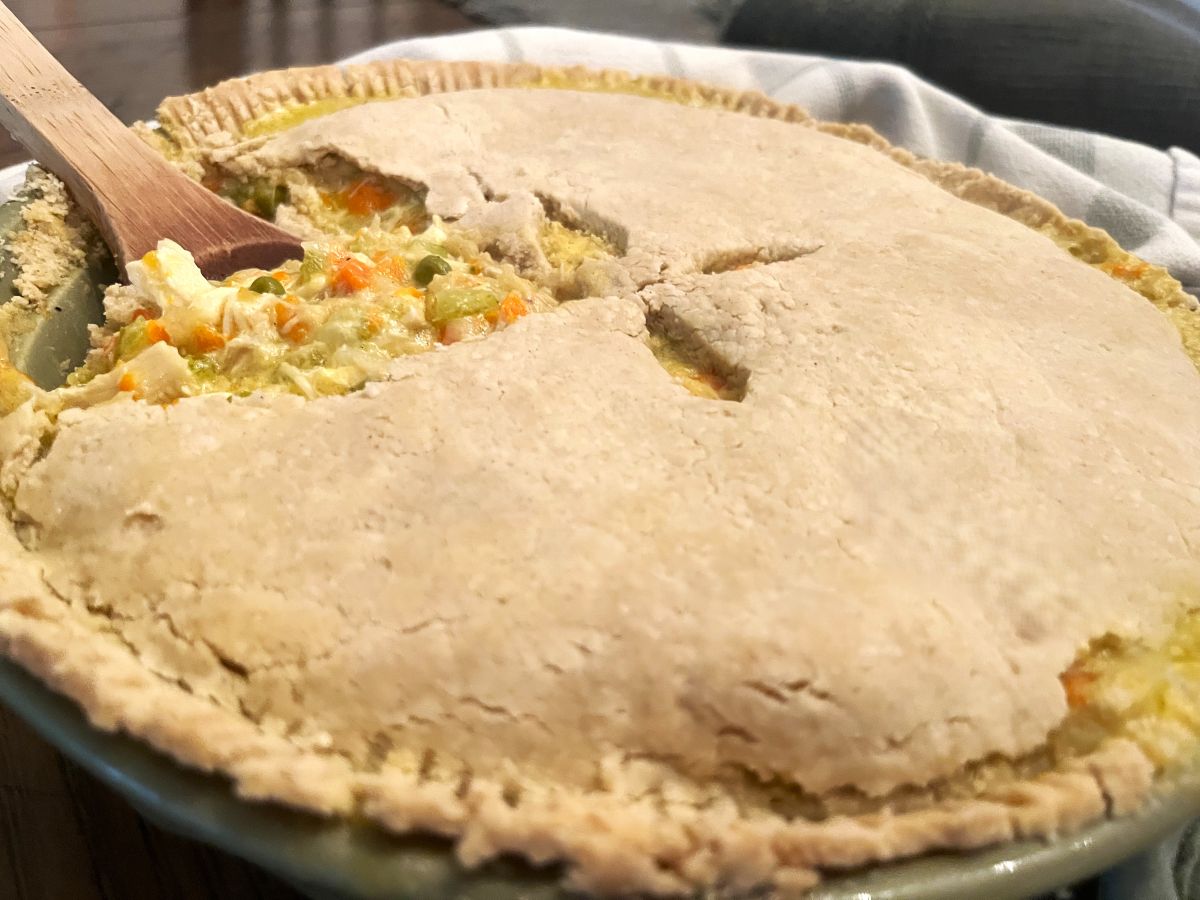
A gluten free diet doesn’t need to rob you of your favorite foods. Gluten-free chicken pot pie is the perfect blend of nostalgia and comfort food. Crispy on top and colorful and gooey in the middle, gluten free chicken pot pie packs in flavor, texture and nutrients for you and your family.
What You’ll Love about Gluten-Free Chicken Pot Pie
- Well-rounded blend of 5 food groups (protein, whole grain, veggies, dairy, fat)
- Packed with vitamins and minerals-full of protein, fiber, vitamin A, antioxidants, and collagen
- Kid-friendly steps-a great recipe for teaching your kids in the kitchen (see steps below)
- Customizable for picky eaters and food allergies (see variations)
- Baby-Friendly-soft, colorful and flavorful, this meal is naturally suitable for older infants and can be modified as needed for younger babies.
- Healthy, Delicious, Nostalgic and Truly Comforting!
Ingredients for Gluten-Free Chicken Pot Pie

Filling:
- Chopped Cooked Chicken– I like using a whole roaster chicken, but 3-4 chicken breasts also work well.
- Finely chopped onion, carrots and celery-Carrots and onions fall in the clean 15 list, so organic isn’t necessary. Be sure to wash celery thoroughly before using, and you can opt for organic if desired.
- Peas-Frozen or canned work fine. If using canned, opt for low/no salt added and rinse thoroughly. These are a “clean 15” food, so organic is also not necessary.
- Diced Potatoes-To save some time, I like to use low/no salt added canned potatoes. You can also peel and parboil your own potatoes and dice them if desired. Potatoes are neither dirty dozen or clean 15, but if you’re concerned, know that washing and peeling them removes most of the risky residue.
- Chicken Broth-You can make your own from the juices of the roaster chicken or you can use bone broth for added protein and nutrients. I often add a small amount of bone broth to cook the chicken in, and this volume increases as the chicken cooks. I also leave the giblets in while cooking to add some extra nutrients.
- Butter or Ghee-I’ve used butter and ghee in this recipe. Both work equally well. If you have any sensitivity to dairy or lactose intolerance, ghee is a better option.
- Flour-I typically use a gluten-free flour blend for this part of the recipe. You can also use plain rice flour or tapioca flour.
- Milk-All types of milk will work fine for this recipe. I used grass-fed whole milk, but whatever dairy or non-dairy alternative you have on hand should work.
- Salt & Pepper-Once again, any type of salt or pepper is fine. You may need more or less, depending on if you used a seasoned broth.
Crust:
- Butter or Lard-You can use either interchangeably and they will each give a slightly different flavor and texture to the crust.
- Oil-I like to use olive or avocado oil for their nutrient benefits.
- Gluten Free Flour Blend-I prefer Bob’s Red Mill Gluten Free 1 to 1 Baking Flour.
- Gluten-Free Oat Flour-I like to add oat flour for a little extra fiber.
- Salt-If using unsalted butter, lard or oil, adding an 1/8 to 1/4 tsp salt helps to add flavor.
- Iced Water-A plain cup of water with ice will do.
How to Make Gluten-Free Chicken Pot Pie
Despite the grand intro, this recipe (or any homemade pot pie for that matter) is not for the faint of heart. I’ll offer some short cuts, but to maximize the nutrients and health benefits from the ingredients, the fewer short cuts the better! This may be a “few times a year” type of meal, but I can assure you that it’ll be memorable.
You’ll also benefit from multitasking throughout this recipe (see more tips below).
Filling
*Note: The chicken can be cooked in advance to save time. You can also begin steps 5 and beyond while the chicken is cooking.
- Place chicken in an instant pot or slow cooker with at least 1 cup of broth or water (if using instant pot).
- Cook chicken for 8 minutes/lb (instant pot) or 4-6 hrs on high/8-10 hours on low (slow cooker).

3. Once chicken is cooked, remove from the slow cooker to cool. Shred and set aside.
4. If using the broth, strain into a glass measuring cup and set aside.

- If making a butter crust, take the butter out of the fridge to soften.
- Preheat the oven to 400 degrees.
- Peel and chop the carrots, celery and onions and place them into large pot or Dutch oven.

8. Add the butter or ghee and saute over medium-high heat for ~5-10 minutes until the veggies are softened and translucent.

9. While the veggies are sauteing, combine the chicken broth and milk in a glass bowl or measuring cup and microwave for approximately 4 minutes to pre-warm (this step isn’t necessary, but helps the mixture to boil and thicken more quickly).

10 . Once the veggies are soft, add the gluten-free flour and stir approximately 2 minutes to create a roux.

11. Add chicken broth and milk (or warmed mixture) to the veggie roux. Reduce heat to medium, stirring almost constantly until the mixture begins to thicken and bubble. Continue to stir for 1-2 minutes until fully thickened.

12. Drain and rinse peas and potatoes (dice potatoes if necessary).

- Stir in the shredded chicken, peas, potatoes, salt and pepper to the pot-pie mixture.
- If using a Dutch oven, set the mixture aside until the crust is ready. If using pie plates or other sized pans, pour the mixture into the pan(s) and set aside. Note: this mixture will fill 2 pie plates or 1-9×13 pan.

Crust:
- Combine flour, salt, oil and butter with a pastry blender to form pea-sized clumps.
- Stir in ice water and use your hands to form into a ball. If it’s too crumbly, add an additional tablespoon of water.

- Flatten the dough ball into a disk and roll out onto waxed paper (~12” circle for Dutch oven or ~1” larger than the edge of the pan/pie plate that you’re using).
- Trim off rough edges and very carefully flip the waxed paper on top of the pot pie pan.
- Crimp edges and feel free to make a fun design for air holes.

- Bake for 25-30 minutes until crust is flaky and pot-pie is bubbly. The gluten-free crust may still appear light colored when fully cooked.

*Note: Gluten free pie crusts can be extra crumbly. It can take practice to learn how to make them successfully. My best advice is to make sure you add enough liquid and always roll them out on waxed paper (not pastry mat) for easy transfer. If using single gluten-free flours rather than blends you may need to add an egg to hold the ingredients together.
**This is a single crust recipe. If you choose to bake in 2 large pie plates, you will need to double the crust recipe.
Time Saving Tips
- You may find it easier to cook and shred the chicken a day ahead of time. Just be sure to save the broth for the next day.
- Making the crust ahead of time, whether earlier in the day or the day before (and refrigerating in a disc shape) can also help to save time on the day of.
- If you decide to cook all on one day, start prepping the veggies and/or crust dough while the chicken is cooking.
- To save on dishes, if you have a large oven safe pot or Dutch oven, cook the food directly in the pot that you’re going to bake it in.
- This recipe also creates a lot of dishes…once you finally get your masterpiece in the oven, be sure to start working on the dishes!
Variations & Substitutions
Chicken Pot Pie for Babies
This recipe includes finely chopped, soft cooked veggies, making it very suitable for older babies (9-12 months).
- To reduce the risk of allergic reactions, be sure that your infant has tried at least most of the ingredients separately before introducing this meal
- Cut the chicken and crust into small chick-pea sized pieces
- Flatten the peas with a fork
- For infants who are not yet ready for these textures, feel free to put this through a food mill to create a more uniform texture
Chicken Pot Pie with Rotisserie Chicken
- You can easily use rotisserie chicken as a short cut in this recipe. This works when you’re in a pinch, but just know that it takes away the added benefits of homemade broth and adds some extra ingredients from the brine solution. Be sure to check the ingredients list for any gluten.
Dairy-Free Chicken Pot Pie
- For the filling: Sub out the butter for the equal amount of dairy free butter (i.e. Earth Balance, Country Crock Plant, Violife etc), or olive, avocado or coconut oil. The dairy free butter will provide the most similar flavor to butter, but the other options will also work! Replace the milk with an unsweetened mild flavored plant-based milk such as almond or cashew. Oat and coconut milks can tend to give off a more noticeable sweet flavor in this savory dish, so I don’t recommend them unless you’re allergic to nut milks.
- For the crust: Sub out the butter for an equal amount of lard, dairy-free butter or olive, avocado or coconut oil. Lard and dairy-free butter will give you the most similar result to regular butter. Coconut oil tends to make a slightly chewier crust and liquid oils like olive and avocado will make a smoother, less flaky crust. Olive oil also has a more noticeable flavor.
Gluten Free Chicken & Biscuits
- Use the filling recipe above, but instead of topping it with a crust, serve it with your favorite gluten free biscuit recipe. I love Cappello’s Buttermilk Biscuits (in the frozen section) as a quick, delicious option.
Gluten Free Pie Crust
- If you’re just looking for an easy, tried and true gluten free pie crust recipe, you can use the same crust recipe and roll out into a 12” circle on waxed paper.
- Be sure to use a mild flavored oil like avocado or canola oil.
- Trim the edges, place the pie plate upside down over the pie crust and carefully invert the waxed paper and pie plate right side up. Remove the waxed paper.
- Fold the crust edge under ~¼ inch and crimp as desired.
- For pre-baked pie crusts (cold pies), poke fork holes throughout the crust to allow air to escape. Bake at 450 for 10-15 minutes until slightly golden brown.
- For cooked pies, bake as directed by the pie recipe.
- See note above for more GF pie crust tips.
Muffin Tin Pot Pies
- Check out this super kid-friendly variation of gluten-free chicken pot pie.
- The recipe doesn’t specify gluten free ingredients, so be sure to reference the gluten-free recipe below for substitutions.
- Or you can simply use this same recipe by cutting the filling recipe in half and by doubling the crust recipe.
- Then, follow the crust rolling and baking steps from the muffin tin recipe.
Ramekin Chicken Pot Pies
If your kids are anything like mine and have different food preferences, this variation makes the recipe easy to customize.
- You can leave out the potatoes and/or peas altogether or customize each individual ramekin.
- Split the filling between ramekins. You will likely have leftover filling, so you can either cut the recipe in half or place the remaining filling in a smaller pie plate or baking dish (You will need to double the crust recipe for this option).
- Using the crust recipe above, cut individual mini round crusts with a large biscuit cutter or an upside down wide-mouth glass cup. Top ramekins with mini crusts.
- Your kids can then decorate their individual pot pie crust with their initials or by adding extra cookie cutter crust designs.
- Bake for 15-20 minutes until crust is golden brown and pot pies are bubbly. If you’re also baking an extra side of pot pie along with the ramekins, this may take an extra 5-10 minutes.
Kid-Friendly Steps
This recipe is another great way to get your kids involved in cooking!
- Age 2-3: unwrapping the butter, dumping the cans, adding salt & pepper, stirring the filling mixture
- Age 4-7: shredding the chicken, using the chopper, measuring and dumping crust ingredients, using the pastry blender
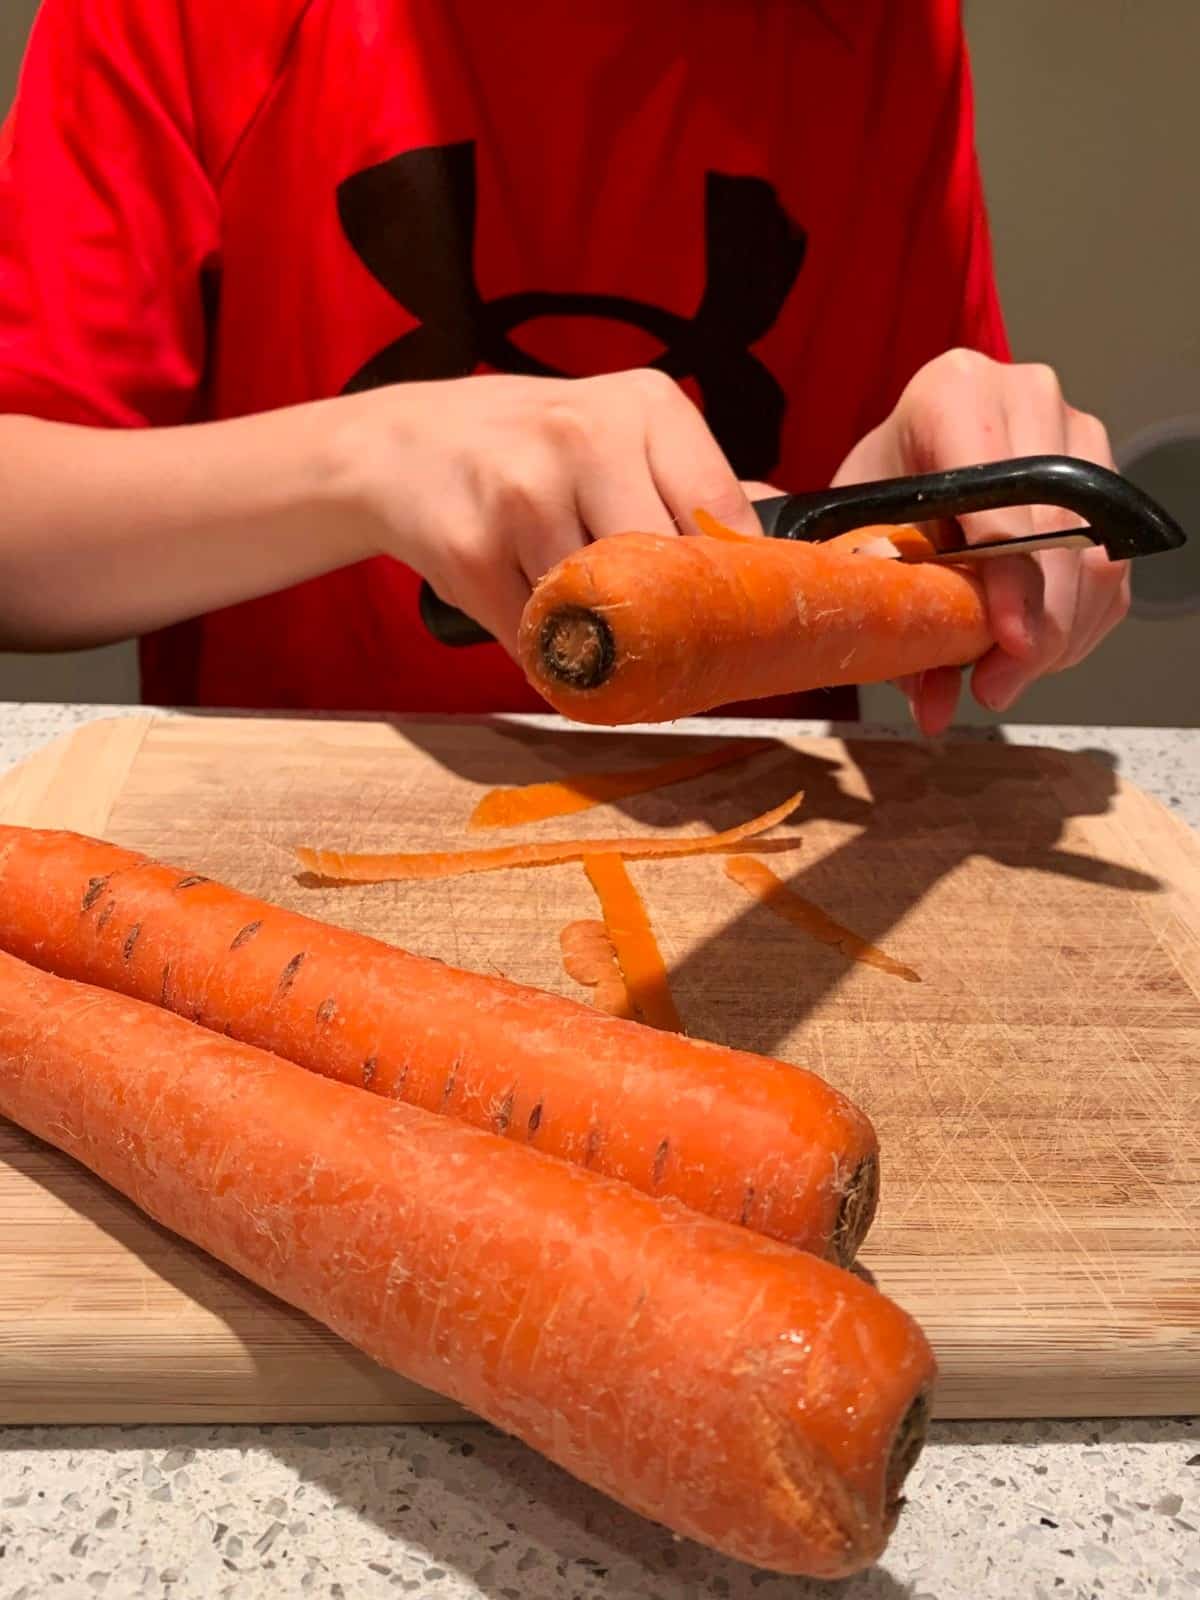
- Age 8-9: peeling and measuring the veggies, rolling out the crust
- Age 10-12+: making the pie crust, rough-cutting the veggies, measuring the liquids, assisting with the entire recipe
Note: Children should always be supervised by an adult when using sharp utensils such as graters and peelers and when using the oven.
Best Side Dishes for Chicken Pot Pie
As a dietitian, I’m always looking for ways to add more color to meals. This meal already includes 5 different food groups, with an entire serving of veggies in each portion. But if you want to round it out even further, I encourage adding a quick fruit or veggie side (that doesn’t take up extra oven space). Since the meal takes a while to prepare, quick is the key word. My go-to favorites are:
- Applesauce
- Side salad
- Steamed frozen veggies

Gluten-Free Chicken Pot Pie
Equipment
- 1 Crockpot or Instant Pot
- 2 Large Glass Bowls
- 1 Chef Knife
- 1 Veggie Chopper
- 1 Cutting Board
- 1 Large Mesh Strainer
- 1 Dutch Oven or 9×13 Baking Pan
- 1 Rolling Pin
Ingredients
Filling
- 4-5 cups chicken (cooked, chopped) 3-4 chicken breasts or 3-4 lb roaster chicken
- ~2 cups onion, peeled and finely chopped approx. 1 large
- ~2 cups carrots, peeled and finely chopped approx. 6 medium
- ~2 cups celery, finely chopped approx. 8 stalks
- ⅓ cup butter can substitute ghee or olive oil
- ½ cup gluten free flour blend
- 2 cups chicken broth or bone broth can use leftover broth from cooking chicken
- 2 cups milk can substitute dairy-free alternative
- 1 can peas, rinsed and drained
- 1 can potatoes, rinsed and chopped
Crust
- 1 cup gluten-free flour blend
- ⅓ cup gluten-free oat flour
- ¼ cup butter or lard can substitute coconut oil or dairy-free butter
- ¼ cup oil olive or avocado
- 4-5 tbsp iced water
- Dash salt if using unsalted butter/oil
Instructions
Filling
- If starting with uncooked chicken, place the chicken in an instant pot or slow cooker with at least 1 cup of broth or water (if using instant pot).
- Cook the chicken for 8 minutes/lb (instant pot) or 4-6 hrs on high/8-10 hours on low (slow cooker).
- Once chicken is cooked, remove from the slow cooker to cool. Chop or shred and set aside.
- If using the chicken broth, strain into a glass measuring cup and set aside.
- If making a butter crust, take the butter out of the fridge to soften.
- Preheat the oven to 400 degrees.
- Using a veggie chopper or chef knife, finely chop the onions, carrots and celery and place into large pot or Dutch oven.
- Add the butter or ghee and saute over medium-high heat for ~5-10 minutes until the veggies are softened and translucent.
- While the veggies are sauteing, combine the chicken broth and milk in a 4 cup glass bowl or measuring cup and microwave for approximately 4 minutes to warm (this step isn’t necessary, but helps the mixture to boil and thicken more quickly).
- Once the veggies are soft, add the gluten-free flour and stir over medium heat for approximately 2 minutes to create a roux.
- Add the chicken broth and milk (or warmed mixture) to the veggie roux. Reduce heat to medium, stirring almost constantly until the mixture begins to thicken and bubble. Stir for 1-2 minutes until fully thickened.
- Stir in shredded chicken.
- Drain and rinse peas and potatoes (dice potatoes if necessary) and stir into the pot-pie mixture.
- Add salt and pepper to taste.
- If using a Dutch oven, set mixture aside. If using pie plates or other sized pans, pour the mixture into the pan(s) and set aside. Note: this mixture will fill 2 pie plates or 1-9×13 pan.
Crust
- Combine flour, salt, butter and oil with a pastry blender to form pea-sized clumps.
- Stir in ice water and use your hands to form into a ball. If it’s too crumbly, add an additional tablespoon of water.
- Flatten the dough ball into a disk and roll out onto waxed paper (~12” circle for Dutch oven or ~1” larger than the edge of the pan/pie plate that you’re using).
- Trim off rough edges and very carefully flip the waxed paper on top of the pot pie pan.
- Crimp edges and feel free to make a fun design for air holes.
- Bake for 25-30 minutes until crust is flaky and pot-pie is bubbly. The gluten-free crust may still appear light colored when fully cooked.
Notes
FAQs
Yes and No. As mentioned above, this recipe can take a while to make. There are many shortcut options available like ready-made gluten-free pie crust, precooked chicken and pre-chopped veggies, but these can potentially take away from the nutritional value. From personal experience, making the recipe once or twice can help you to get a better feel for the steps and multitasking options. Having your older kids help with steps like peeling or chopping the veggies, shredding chicken or making the crust can be a huge time saver too.
Yes, I’ve used olive oil in both the roux and pie crust before. I personally prefer the flavor of the butter and find that my roux turns out a little better with butter or ghee. But olive or avocado oil will also work. You can also make an all-oil pie crust, though it will give a different flavor and texture. I prefer to mix part oil and part butter to lower the saturated fat while still leaving some buttery, flaky texture.
Looking For More Kid-Friendly Recipes?
Visit our recipe blog or join the Newsletter to stay up to date with our latest recipes.
If you’re having trouble planning kid-friendly meals and recipes, check out this article for our best meal planning tips. If you’re looking for ways to get your kids involved in the kitchen, Teaching Kids to Cook offers some great tips and tricks!